PLAYGROUND INSTALLATION
Playground Installation Process
Advanced Recreational Concepts offers several options for playground installation.
- You can choose to have our trained installers handle the commercial playground equipment installation completely.
- You can install the playground structure yourself.
- You can use a combination of the two in which we send a supervisor to your site on your installation day to help organize the installation and teach you a few “tricks of the trade.”
Whichever option you choose, the basics of commercial playground equipment installation process are the same.
Playground Installation
- First off, you’ll need a level site to make it free of any obstacles that might encroach upon the required fall zone for your design. Call all the possible utility companies that may have underground cables or piping running beneath the play area to mark where their runs might be.
- Once the utilities are marked, the installation of your commercial playground equipment will begin. A good starting point is to mark the 4 outside corners of the required fall zone. One of these corners becomes the reference point for placing all of the platforms and play events. We then mark the location of the platforms and then mark the center of each pier to be dug. The piers can be dug either by hand or a power auger of some type, and are generally dug to a depth of 26″, depending on the safety surfacing choice.
- The next step is the most critical of the entire process. You need to have determined the depth of the surfacing used, so that the bottom of the piers are at the same elevation, relative to the surfacing. By setting this elevation and “leveling” the bottom of the piers, all the posts end up at their proper finished elevation, and all the platforms are level.
- Now the fun gets underway! The posts are placed in their respective piers, and the platforms are bolted to the posts. We then add any barrier walls or unitary enclosures to add rigidity to the assembly. The posts are then plumbed, the platforms checked for final level, and the concrete is placed in each pier.
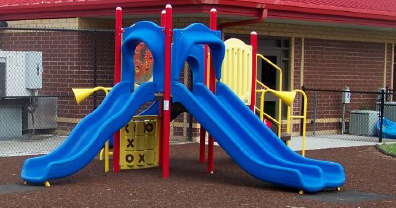
- After the concrete has set, it’s time to add any additional activities or features to the play structure. With step by step instructions and easy to understand installation plans, slides are assembled, climbers are attached, transfer stations are added, and the commercial playground equipment structure is finished. Pour the concrete for the new holes dug to support the attachments, and you’re almost complete!
- The final step in commercial playground installation is installing the border system and fall surfacing materials. Remember the 4 outside corners early in the process? These will also become the inside edges of your bordering system. The borders are usually 6′ long with 2-30″ stakes. Position the borders and drive in the stakes. Next a soil separator fabric is installed. This keep the safety material from mixing with the soil below. Overlap the seams about 6″, and tack down with the supplied nail-in staples. Now it’s time to add the safety surfacing. Usually this will be either 12″ of engineered wood fiber or 6″ of shredded rubber. In either case, move it in and rake it level and to the proper depth.
- We’re down to one last step: let the kids enjoy their new play structure, because the job is done!

